Learn the Basics

Learn the Basics and Start Building

Get an overview of how to navigate the platform, create content, and start building your site with confidence. This guide covers the essential tools and features to help you get started smoothly.

For detailed step-by-step instructions, check out the User Guide.

Want hands-on help? Attend a live training session to learn from our team and ask questions in real time.

Get started with your new site

If you haven’t already, request a new site to get started. Once your site is created and you receive a URL, you can log into your development site by adding /cas to the end of your site’s URL and logging in with your NetID. This will reveal two toolbars at the top of the page, giving you access to editing tools. While the login process is the same as with legacy Drupal 7 sites, the new YaleSites platform offers an updated editing experience and features.

illustration of man on two way path with signs

Navigating the Admin Interface

Once logged in you’ll see your new site and two toolbars at the top. The top toolbar offers site-wide settings, including options for managing content, settings, users, and reports. The second toolbar provides page-specific actions, which appear when you’re viewing a content type. This section will introduce you to both toolbars, helping you navigate and manage your site efficiently.

Watch a video on using the Admin Interface

Screen shot of admin highlighting interface toolbars

Admin Top Toolbar (Site-wide)

The top toolbar contains all of your site-wide-specific settings. These settings are categorized as Content, Settings, People, and Reports. You can also click the Yale icon to return to your assigned homepage. Reference the Site-wide Settings to learn more.

The content section of the top admin toolbar contains all of the primary actions related to creating and managing content on your YaleSite. Here, you can:

In settings, you will find all of the setting configurations that you can customize on your YaleSite. 

YaleSites site-wide alert settings.

Alert settings allow you to create site-wide alerts for your site, including alert types such as Announcement, Marketing, or Emergency. You can only have one active alert at a time, so make sure it is relevant and important to your users. 

Site Settings contain many specific and customized settings that you may want to look at, including assigning your homepage, Google Analytics verification, and a fallback teaser image for your content, to name a few. 

Footer settings allow you to choose between the Basic footer or the Mega footer. The Basic footer contains general Yale branding and social media links. The Mega footer provides advanced features for representing organizational branding, including:

  • Additional icons 
  • A space for an organizational wordmark 
  • A customizable text area for information such as contact information and physical addresses 
  • Up to 8 links in a two-column format 

The redirect page enables you to view and manage all the redirects on your YaleSite. You can edit the details of each redirect, such as the starting URL, the new redirect extension, the status code, and the ability to delete any unnecessary redirects. 

The people section allows you to add new users to your YaleSite which gives them the ability to edit and create content. If your user is Yale affiliated, select Add CAS user(s) and add their NetID in the “CAS Username(s)” input field.   

Admin 2nd Toolbar (Content-specific) 

The second toolbar appears just below the top toolbar and provides actions related to the specific content you’re viewing or editing. When building your site, you’ll primarily use Manage Settings and Edit Layout and Content to configure and structure individual pieces of content.

The Manage Setting page offers logistical settings based on your content type. These settings can be customized to suit your specific needs. All content types include Teaser information. This allows you to assign content that will be used when featuring that content on social media, search engines, and on your YaleSite. Utilize blocks like Views, Post feed, Calendar List, and Profile Directories to see your content’s teaser information in action. 

In addition, you may tag your node with a taxonomy term that belongs to the Tag vocabulary. You can find your taxonomy vocabularies under the top admin bar in Content > Manage Taxonomy. Other content types like Events, Posts, and Profiles have an additional taxonomy vocabulary that is specific to that content type (for example; Post Category, Profile Affiliation, etc.) 

Manage settings sidebar settings.

The Manage settings menu on the right-hand side includes various settings such as: 

  • Adding a page to one of your menus 
  • Editing your metadata 
  • Excluding your page from being indexed by search engines 
  • Adding a redirect to the page 
  • Requiring a CAS login to access the page 
  • Creating a URL alias 

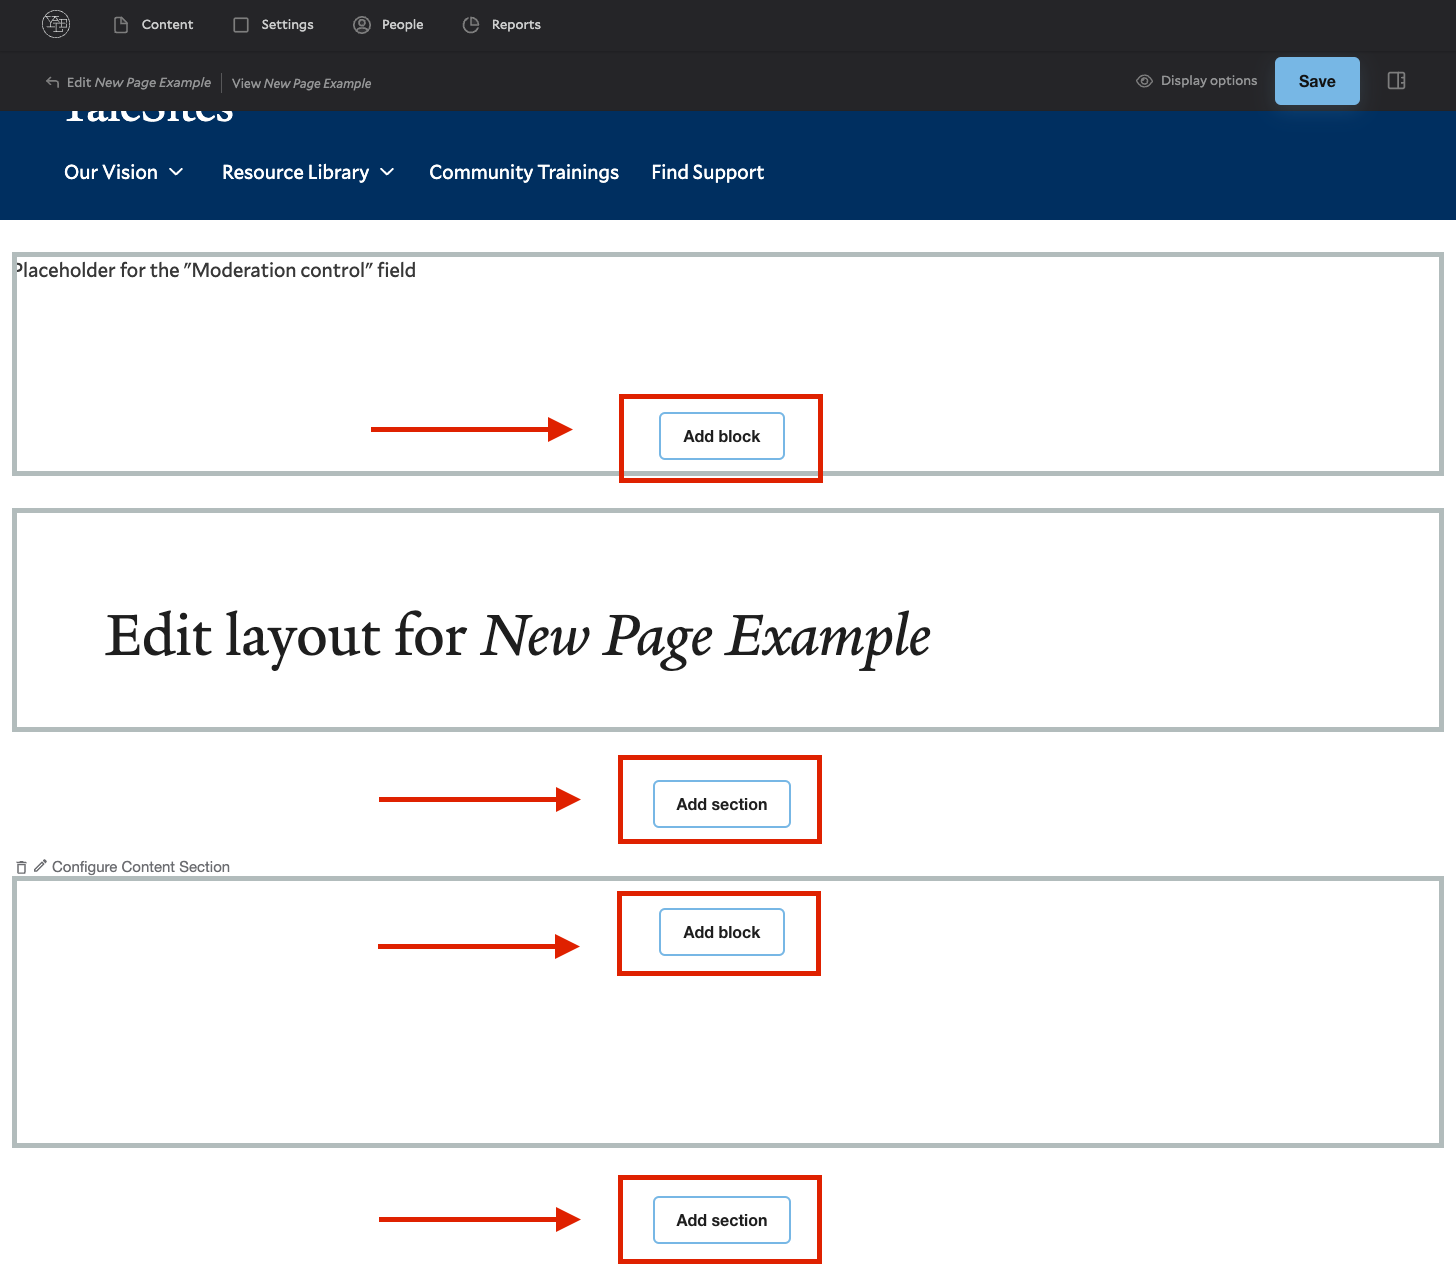
Enable Layout Builder by clicking Edit Layout and Content on the secondary toolbar. This is the primary way to create and manage content on your page. There are two main content areas on a page. The first is the area below the site name but above the page title, which is for Banner content. The other area is below the page title, where the rest of your content will be located. 

To add content, click the “Add Block” button on your page. YaleSites offers pre-built, fully accessible, and responsive web components. To edit existing blocks, click the circle pencil icon on the left of the block, and then click Configure. 

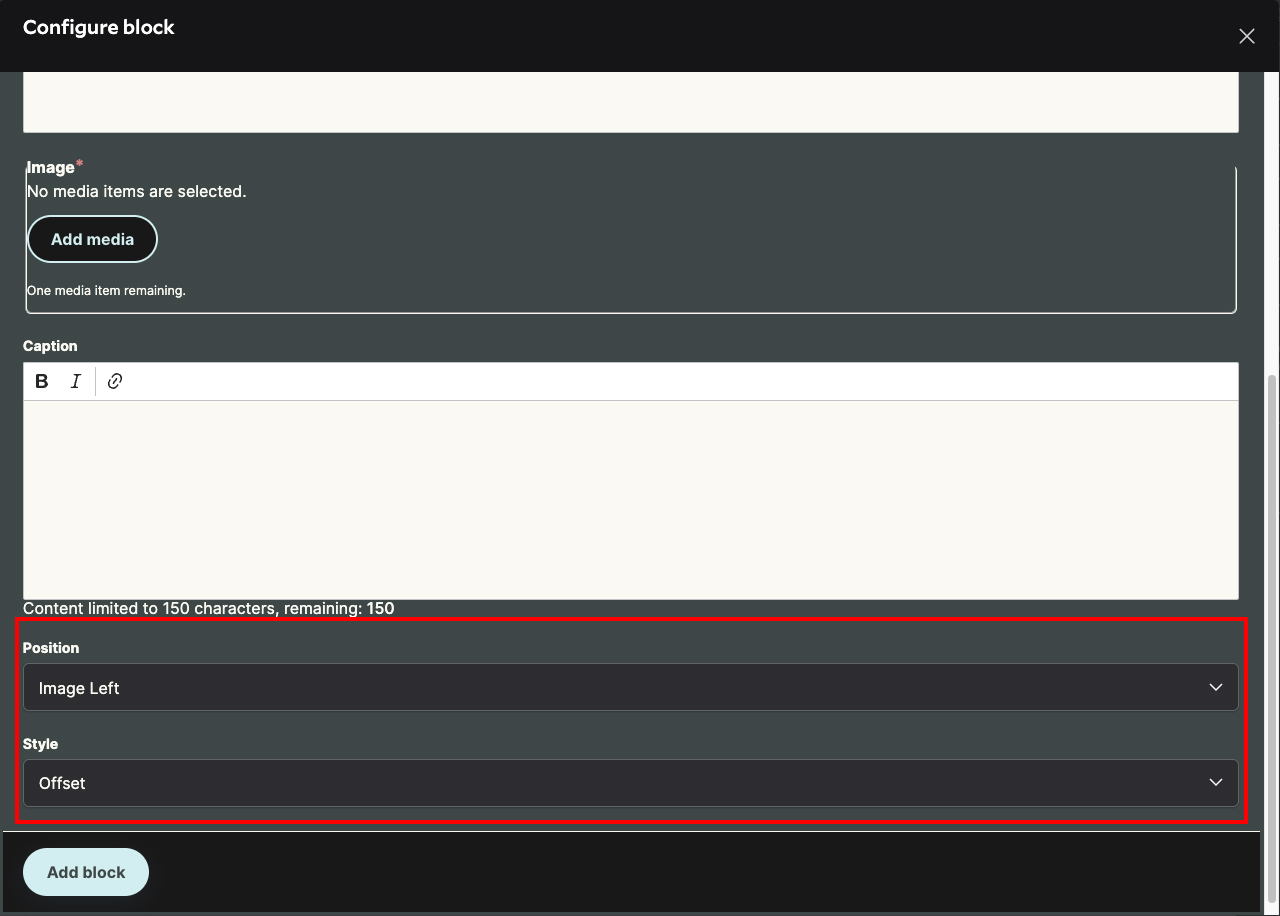
Wrapped Image block design options.

Creating a block requires several text inputs and specific settings based on the block’s content requirements. Certain input fields are mandatory depending on the visual and content demands. Additionally, input fields may have recommended or hard maximum character limits. Furthermore, blocks can have design options that allow you to modify their visuals. For example, the wrapped text block provides design options for image position (left and right) and image style (inline and offset). Our resource, Building With Blocks, goes into more detail on how you can build your site utilizing our blocks to their fullest potential.  

On Page and Profile content types, you can create sections and add one or two column layouts. In a two-column layout, you can add text or profile contact (if on a profile content type) information in the right-side column and select blocks in the main content area. 

Toggle between content and administrative labels via Preview Content

While using the Layout Builder, you can rearrange blocks on your YaleSite by clicking and dragging them. To view your page’s content in a more condensed manner, go to the second admin toolbar and, under Display Options, toggle Preview Content. This will enable you to see only the administrative labels of your blocks and drag and drop them in a more condensed view with less scrolling on your page. 

Build Out Your Content

Use the Edit Content and Layout admin action to build pages with the Layout Builder. Add and arrange content blocks to create custom layouts.

Under the Manage Settings admin action, set options like teaser text, taxonomy, and menu placement to help organize and optimize your content.

Also, look for Editoria11y in the bottom-right corner of the page. It flags potential accessibility issues and offers quick tips for fixes. A checkmark means no issues were found. While not a replacement for full audits, Editoria11y helps keep your content accessible.

Organizing your site with menus

Organizing your site’s navigation helps visitors find what they need quickly and easily. You can add pages to menus from the Edit Page window by toggling “Provide a menu link” in Menu Settings, then choosing a Parent Link like Main navigation.

To adjust your overall menu structure, go to Site-wide Settings > Content > Manage Main Menu and drag items into place.

Choose between two menu styles—Basic and Mega Menu—under Theme Settings > Navigation Type. The Basic style works well for small menus, while the Mega Menu supports multiple levels and columns, with optional landing pages for top sections.

Watch the video on menu structure to see how it all works.

Building Your Menu

Help you understand how the YaleSites menus work and ensure your users can easily navigate your YaleSite.

View This Resource

Customizing the look and feel

Use Theme Settings to customize your YaleSite’s look and feel—from selecting a color palette and assigning color slots to adjusting navigation style and position. You can also fine-tune the design of buttons, headers, and footers to match your brand and ensure a cohesive visual experience.

Learn more about theme settings

Ongoing Content Management

Keeping your site up to date is key to maintaining relevance and trust. In this section, you’ll learn how to manage and edit existing content, add new pages, and keep your menus organized as your site evolves. We’ll also cover best practices for reviewing, updating, and unpublishing content to ensure your site stays fresh and accurate over time.

View the resource Regular Web Auditing and Maintenance