Want a page to show up in your site’s navigation menu? You can do this directly from the page itself—no need to dig into full menu settings. This guide walks you through how to make a page appear in your menu and how to set it as your site’s homepage, all in just a few steps.

For more advanced menu management and multi-level navigation options, visit our Building Your Menu guide.

Important Notes:

  • Only page content types can be added directly to your site’s navigation menu.
  • To display posts, events, or profiles, you’ll need to feature them on a Page using content blocks.
  • Menu settings can be accessed in two ways:
    • From the page itself via the “Manage Settings” side panel
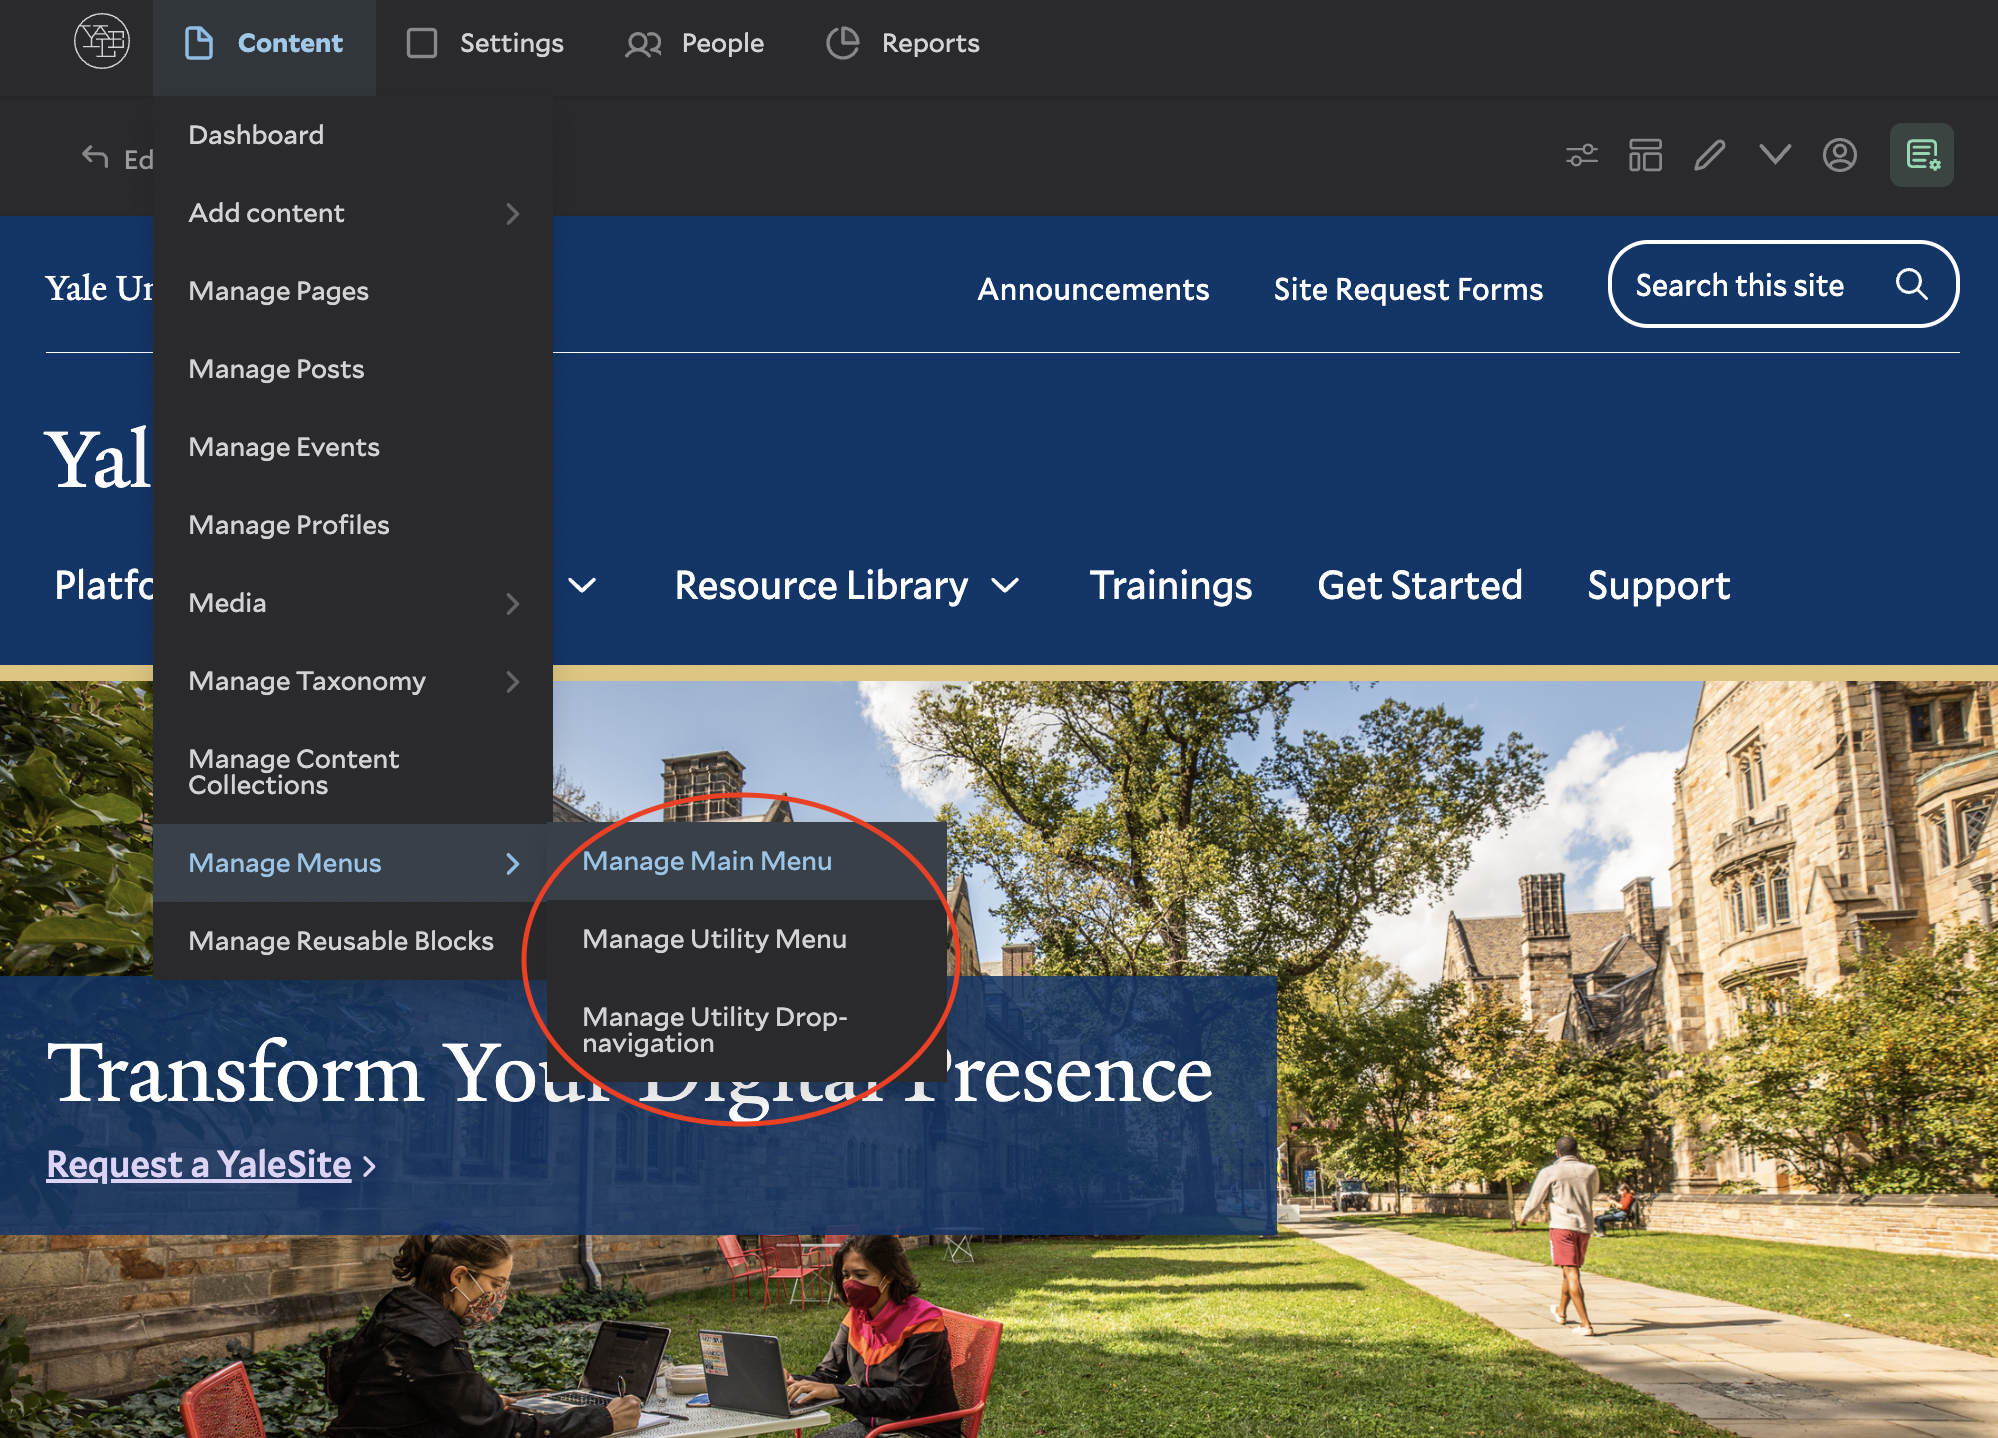
    • Or globally via Content > Manage Menus in the top admin toolbar
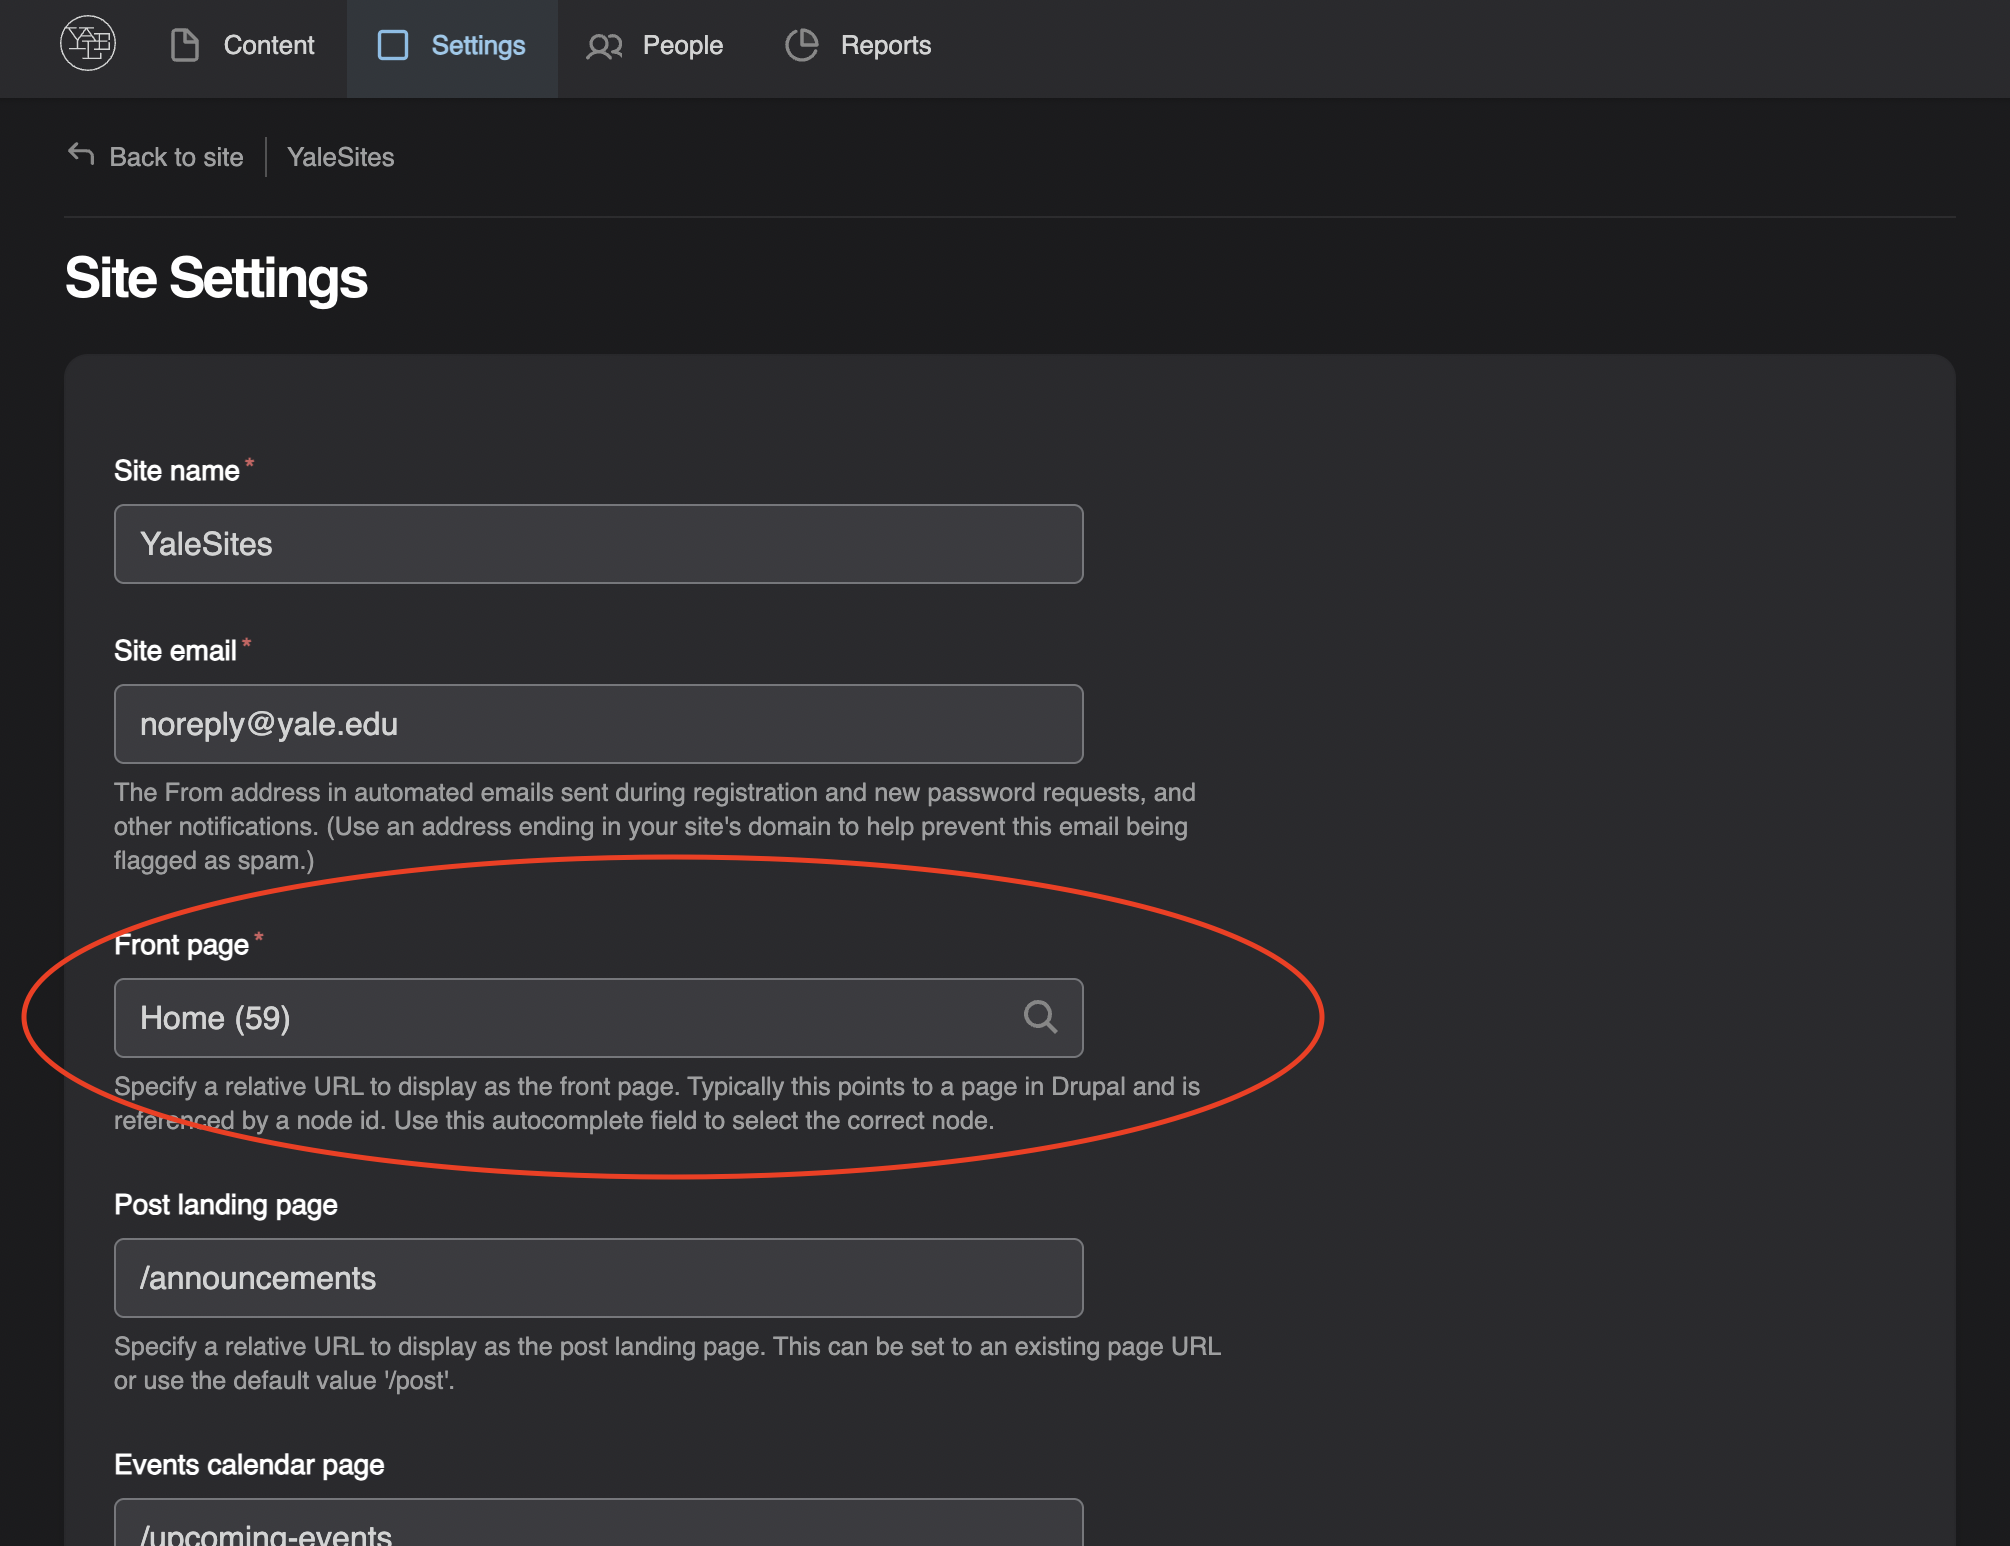
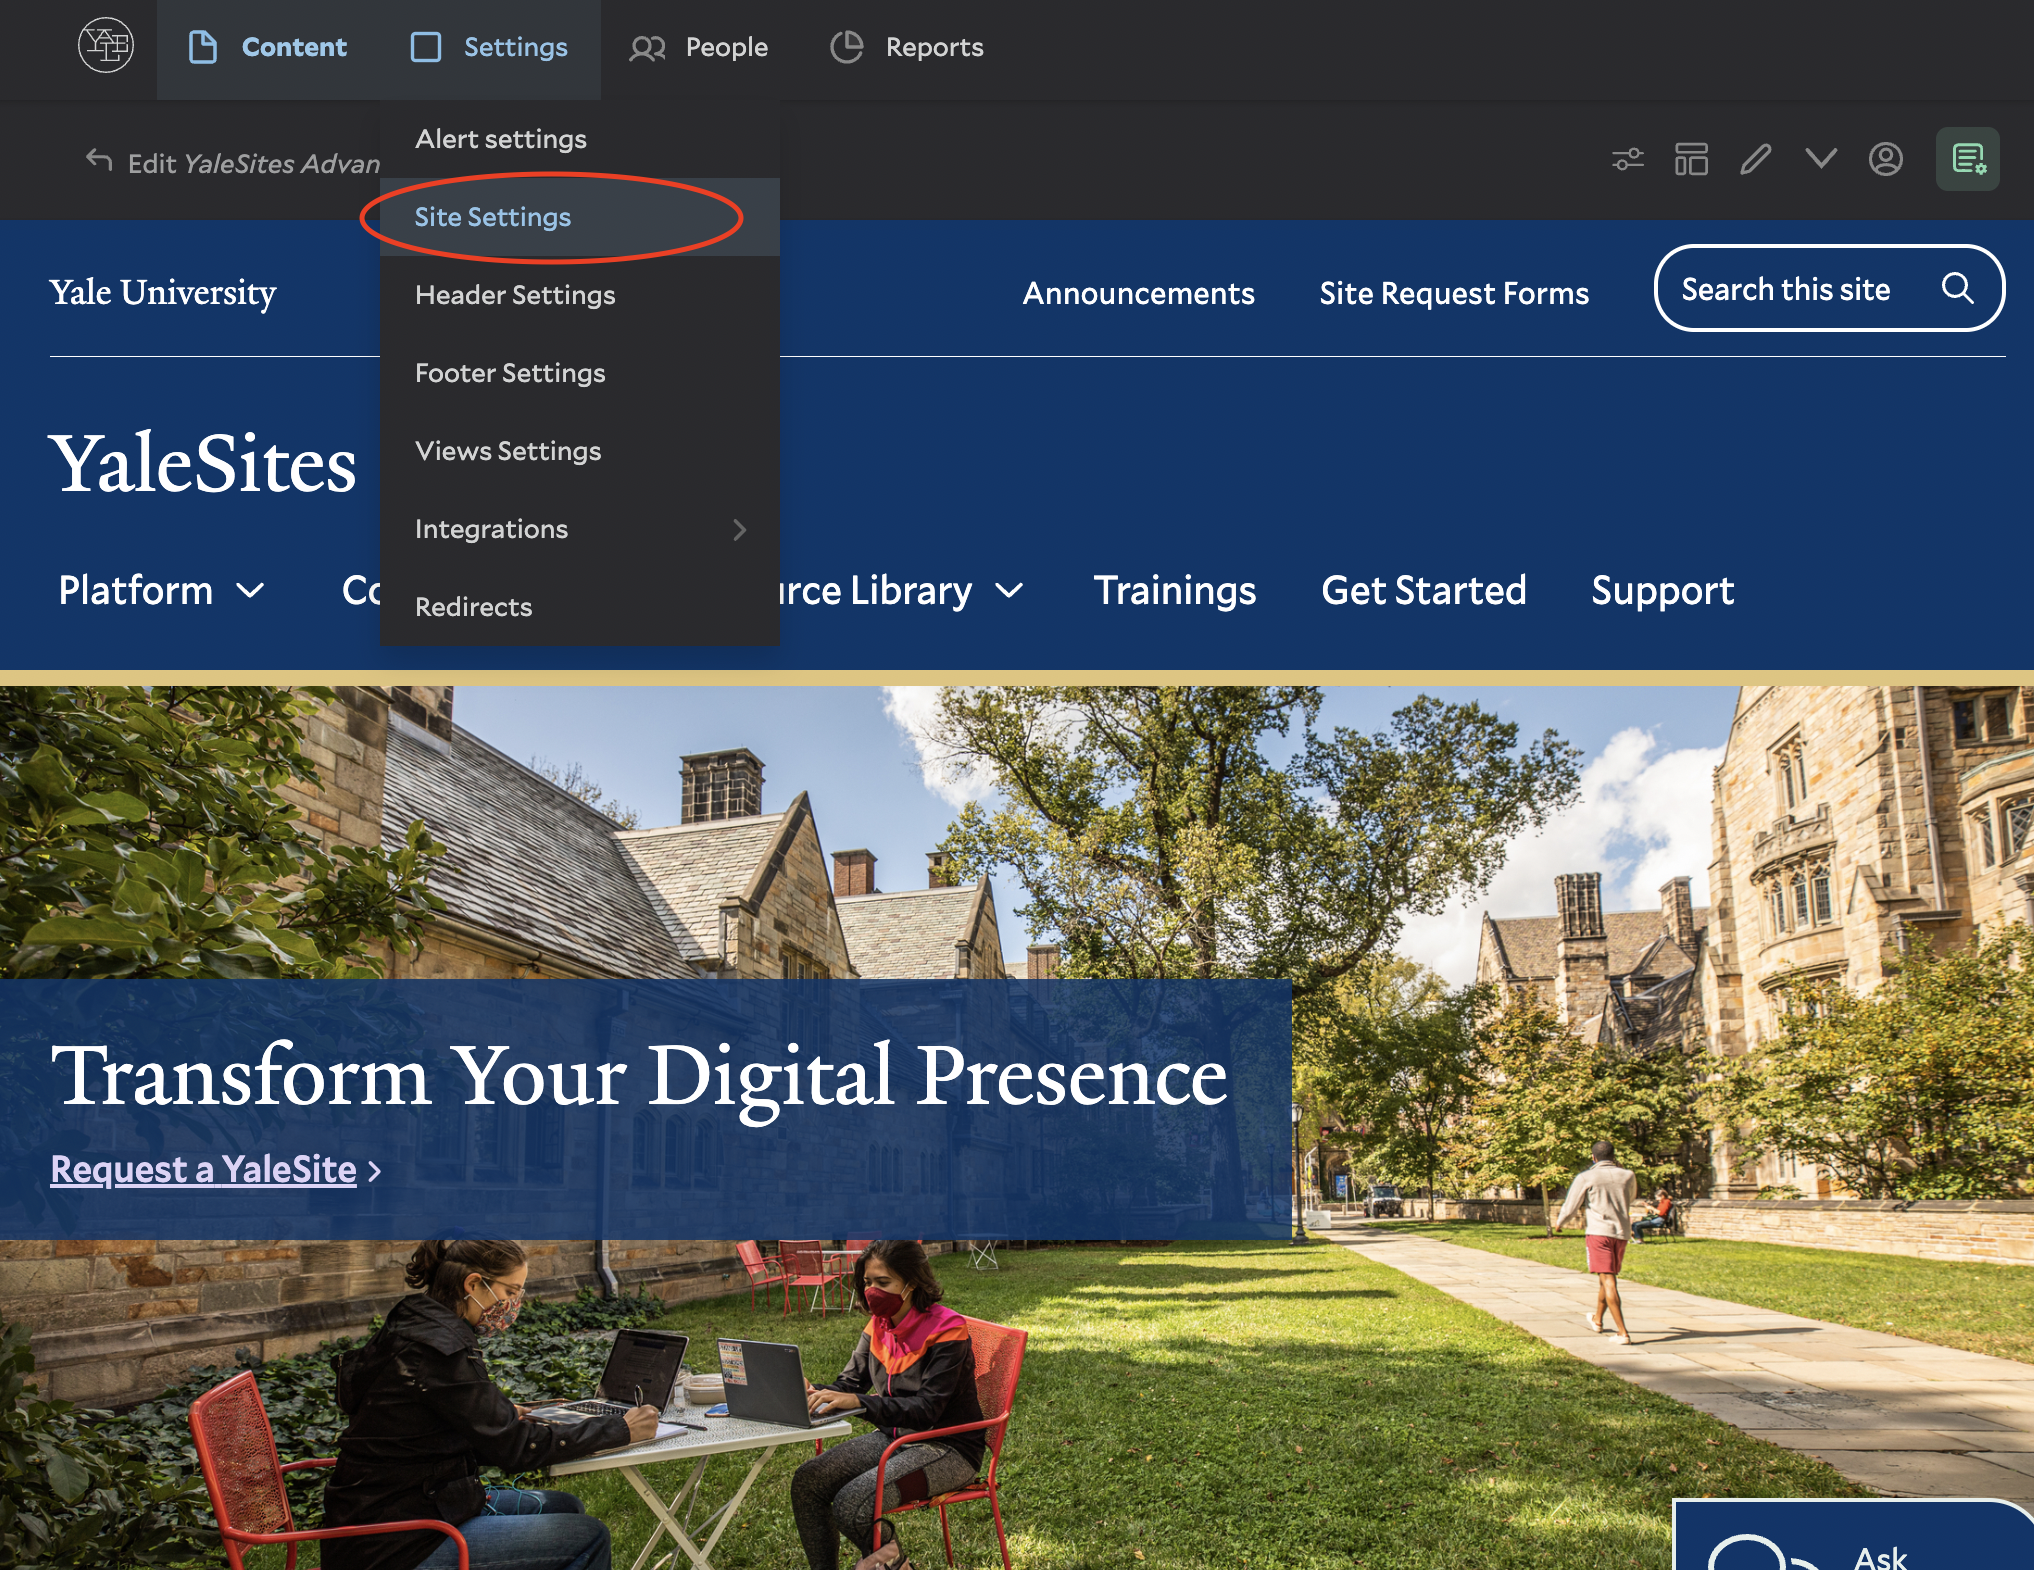
  • To set a Page as your home page, go to Settings > Site Settings in the top admin toolbar and use the “Front Page” field. (Tip: Start typing the page title and select it from the list—don’t paste in a URL.)

Set a Page as the Home Page

To change your site’s homepage:

  1. From the top-level admin menu, go to: Settings > Site Settings 
  2. Find the “Front Page” field.
  3. Begin typing the name of the published page you want as your home.
    Important: Do not paste a URL—you must select the page from the autocomplete list. 
  4. Scroll down and click Save to apply the change.

Page-Level Menu Settings

  1. Log in as an admin.
  2. Go to the page you want to add to the menu.
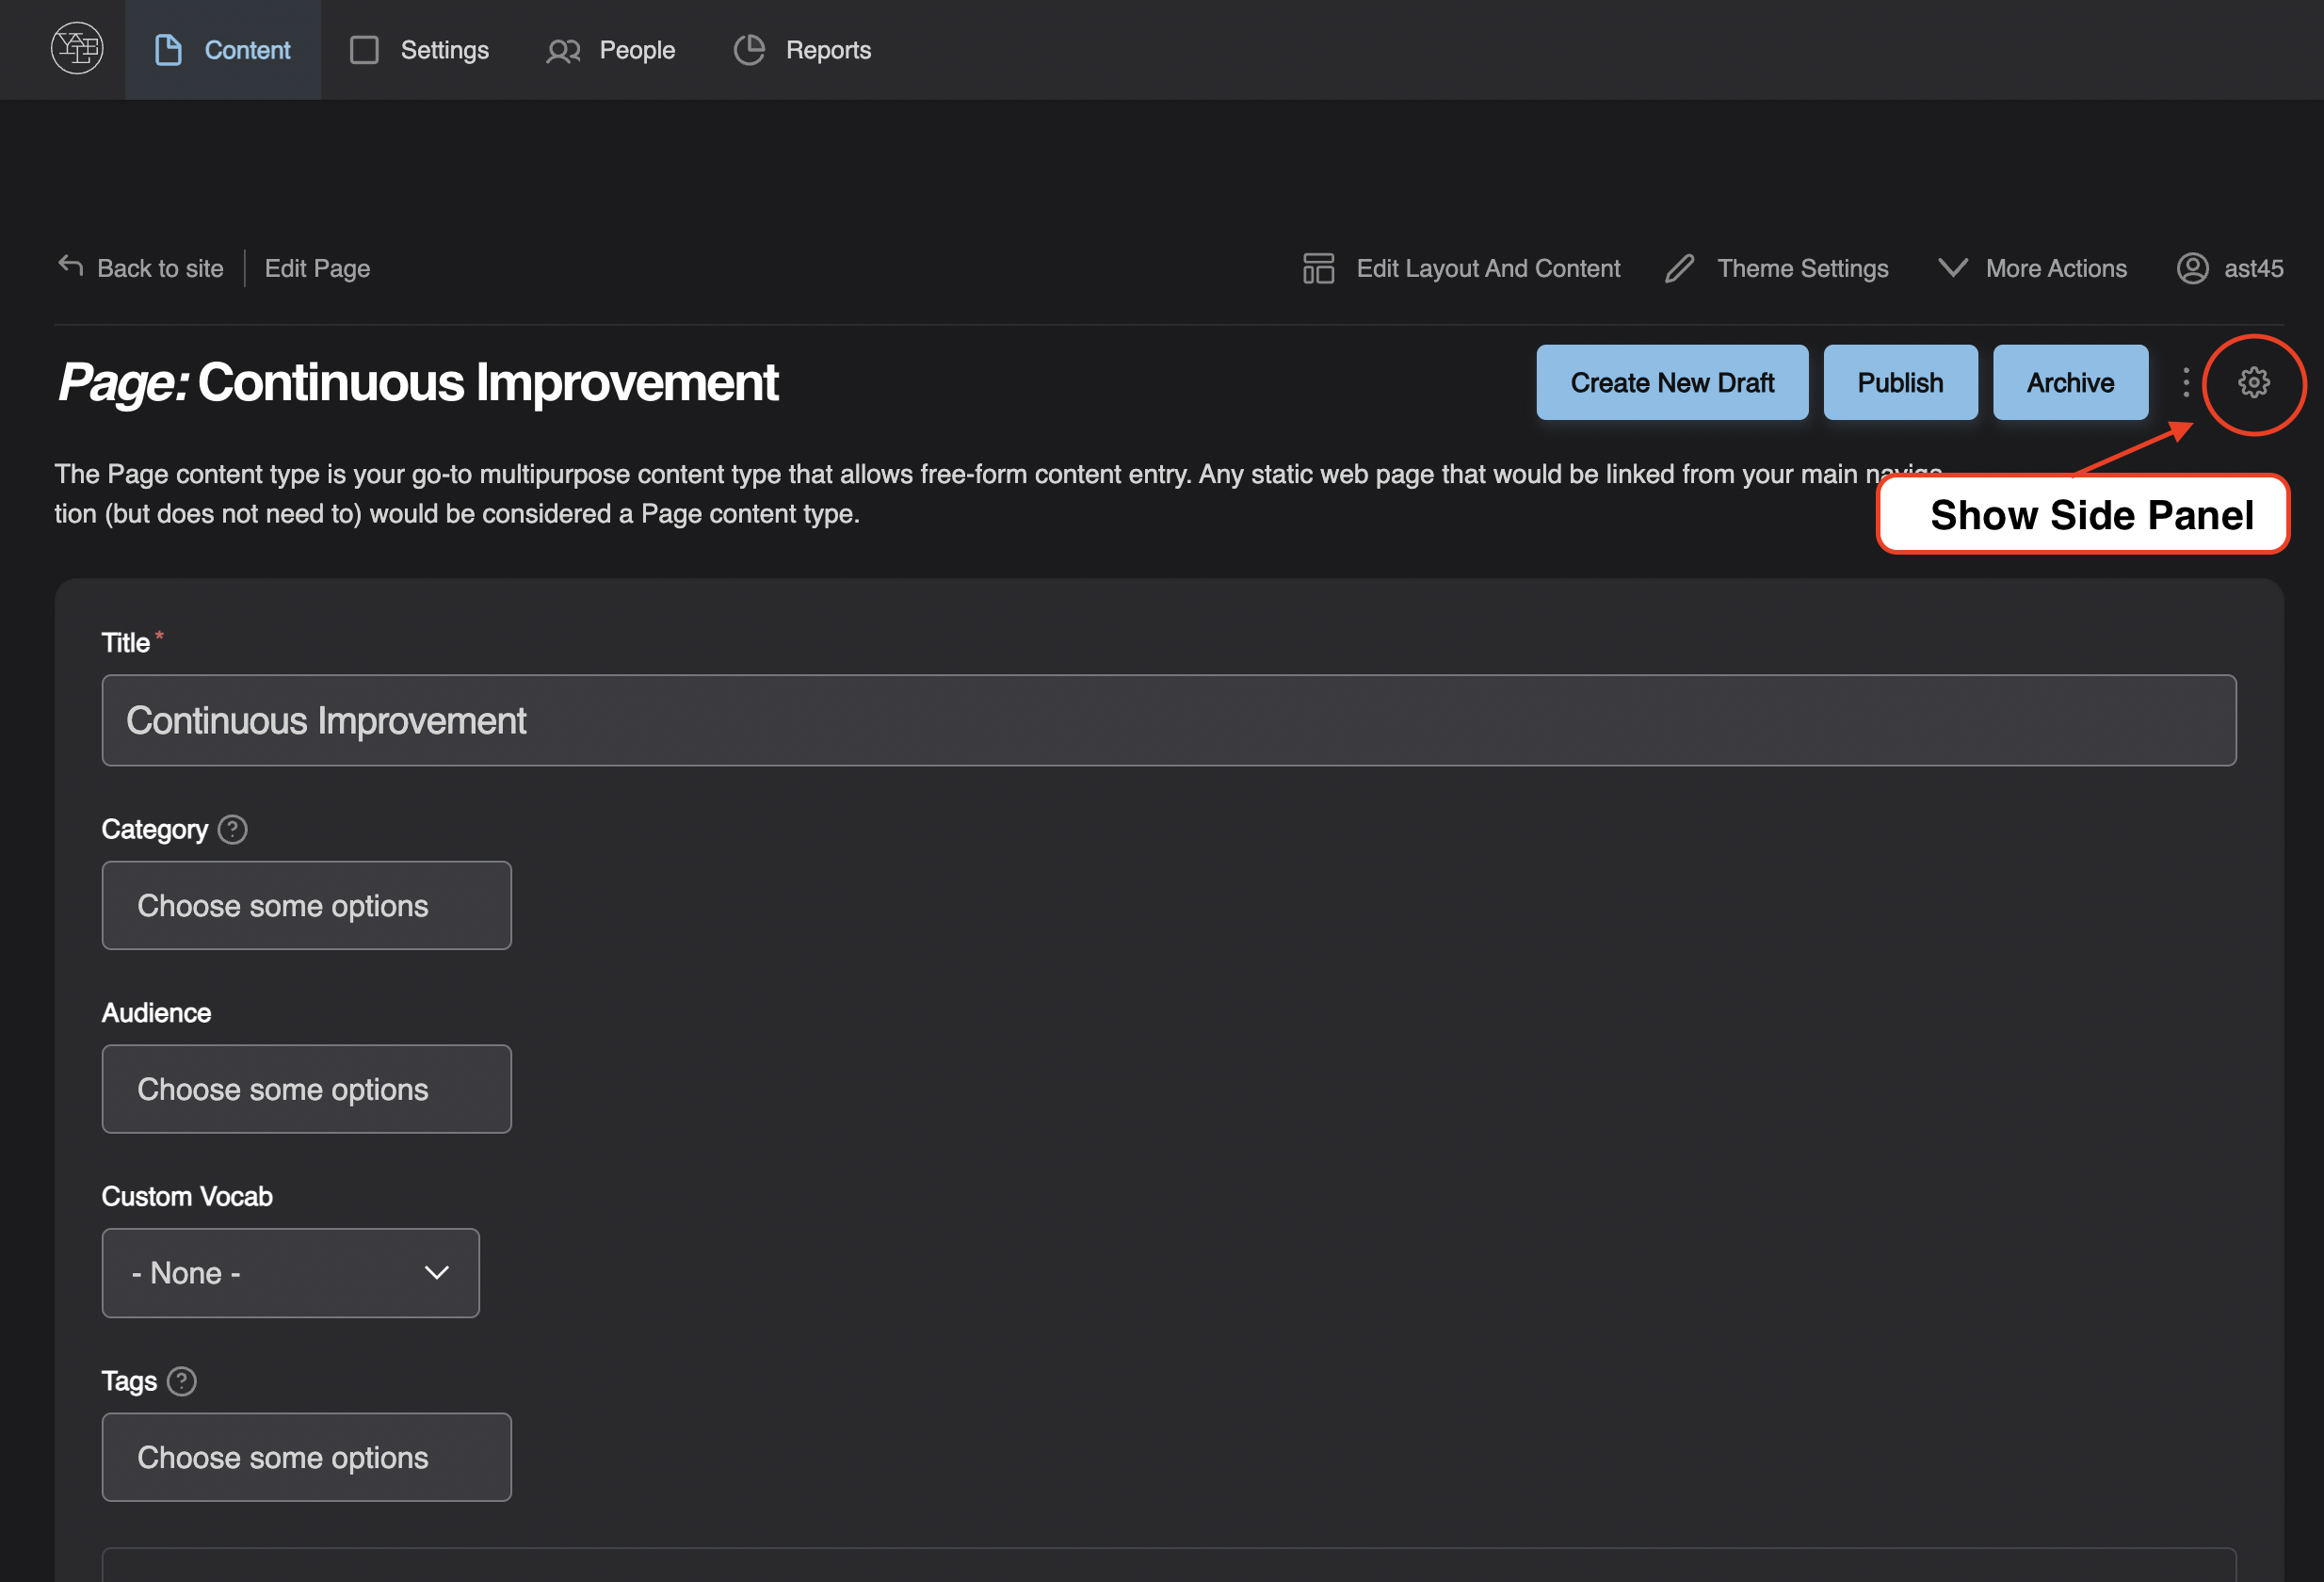
  3. From the top admin toolbar, click “Manage Settings.”
    A right-hand settings panel will open. If it doesn’t appear, click the gear icon in the top-right corner.
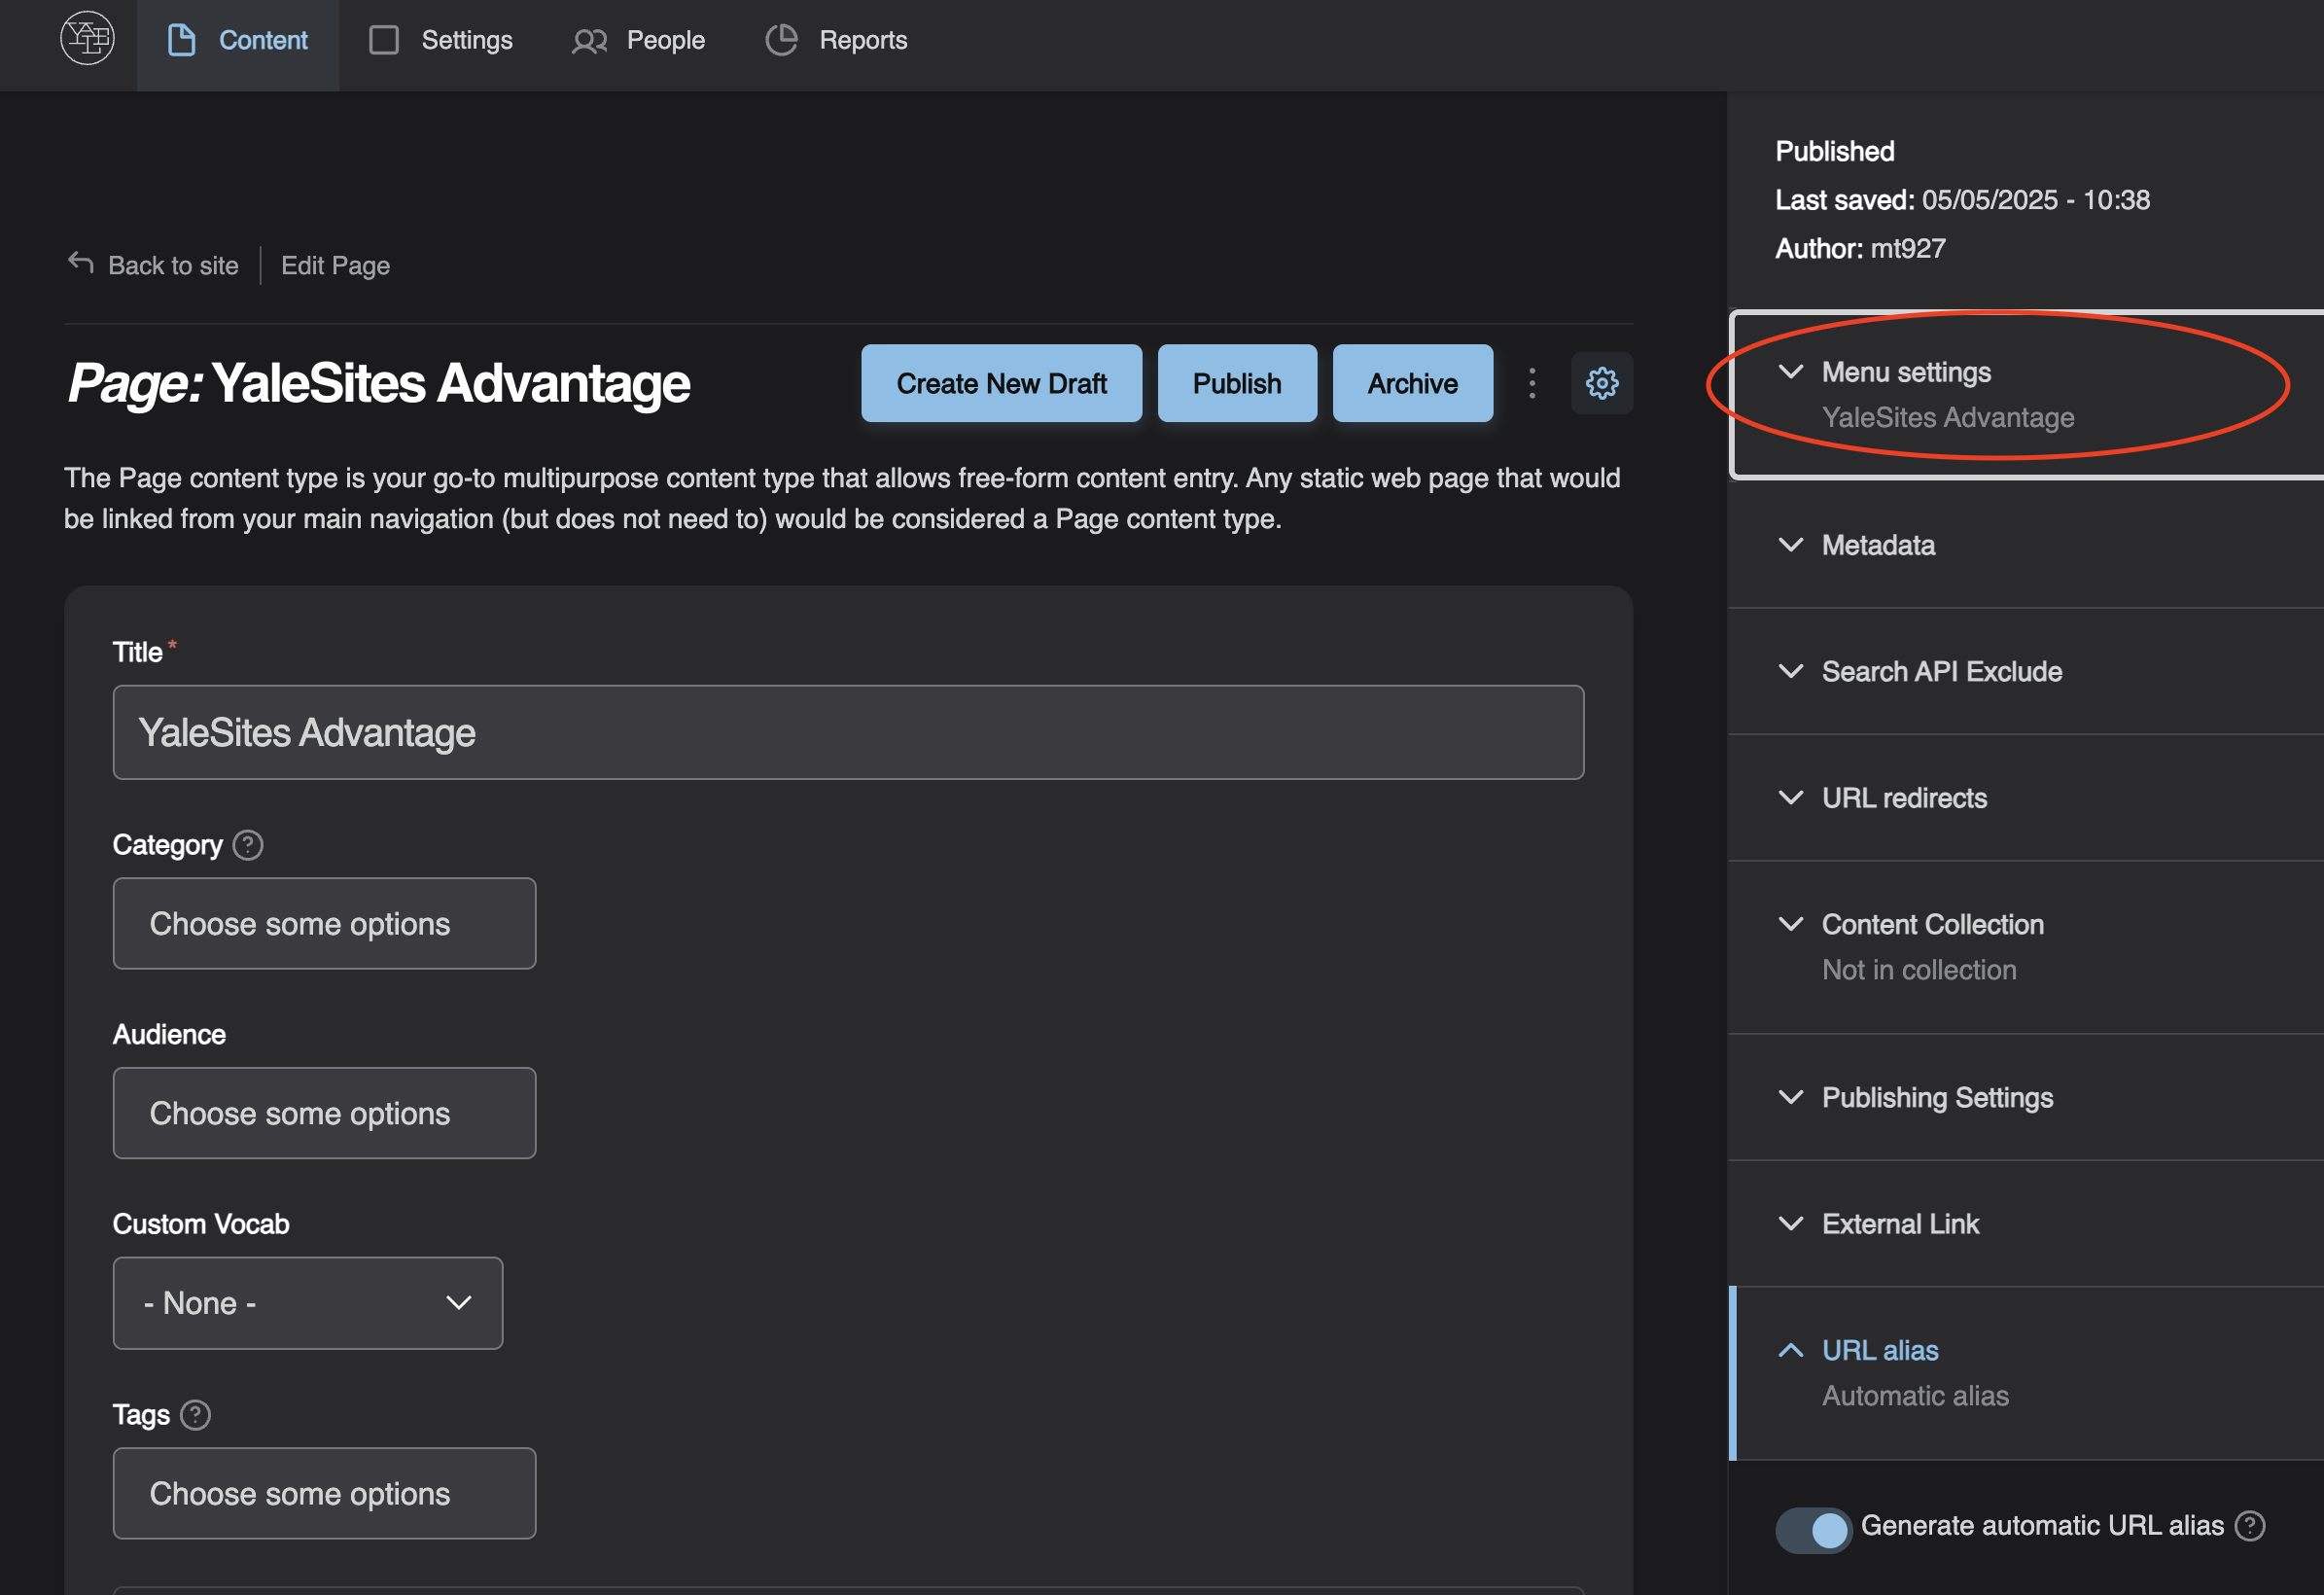
  4. Expand the “Menu Settings” section.
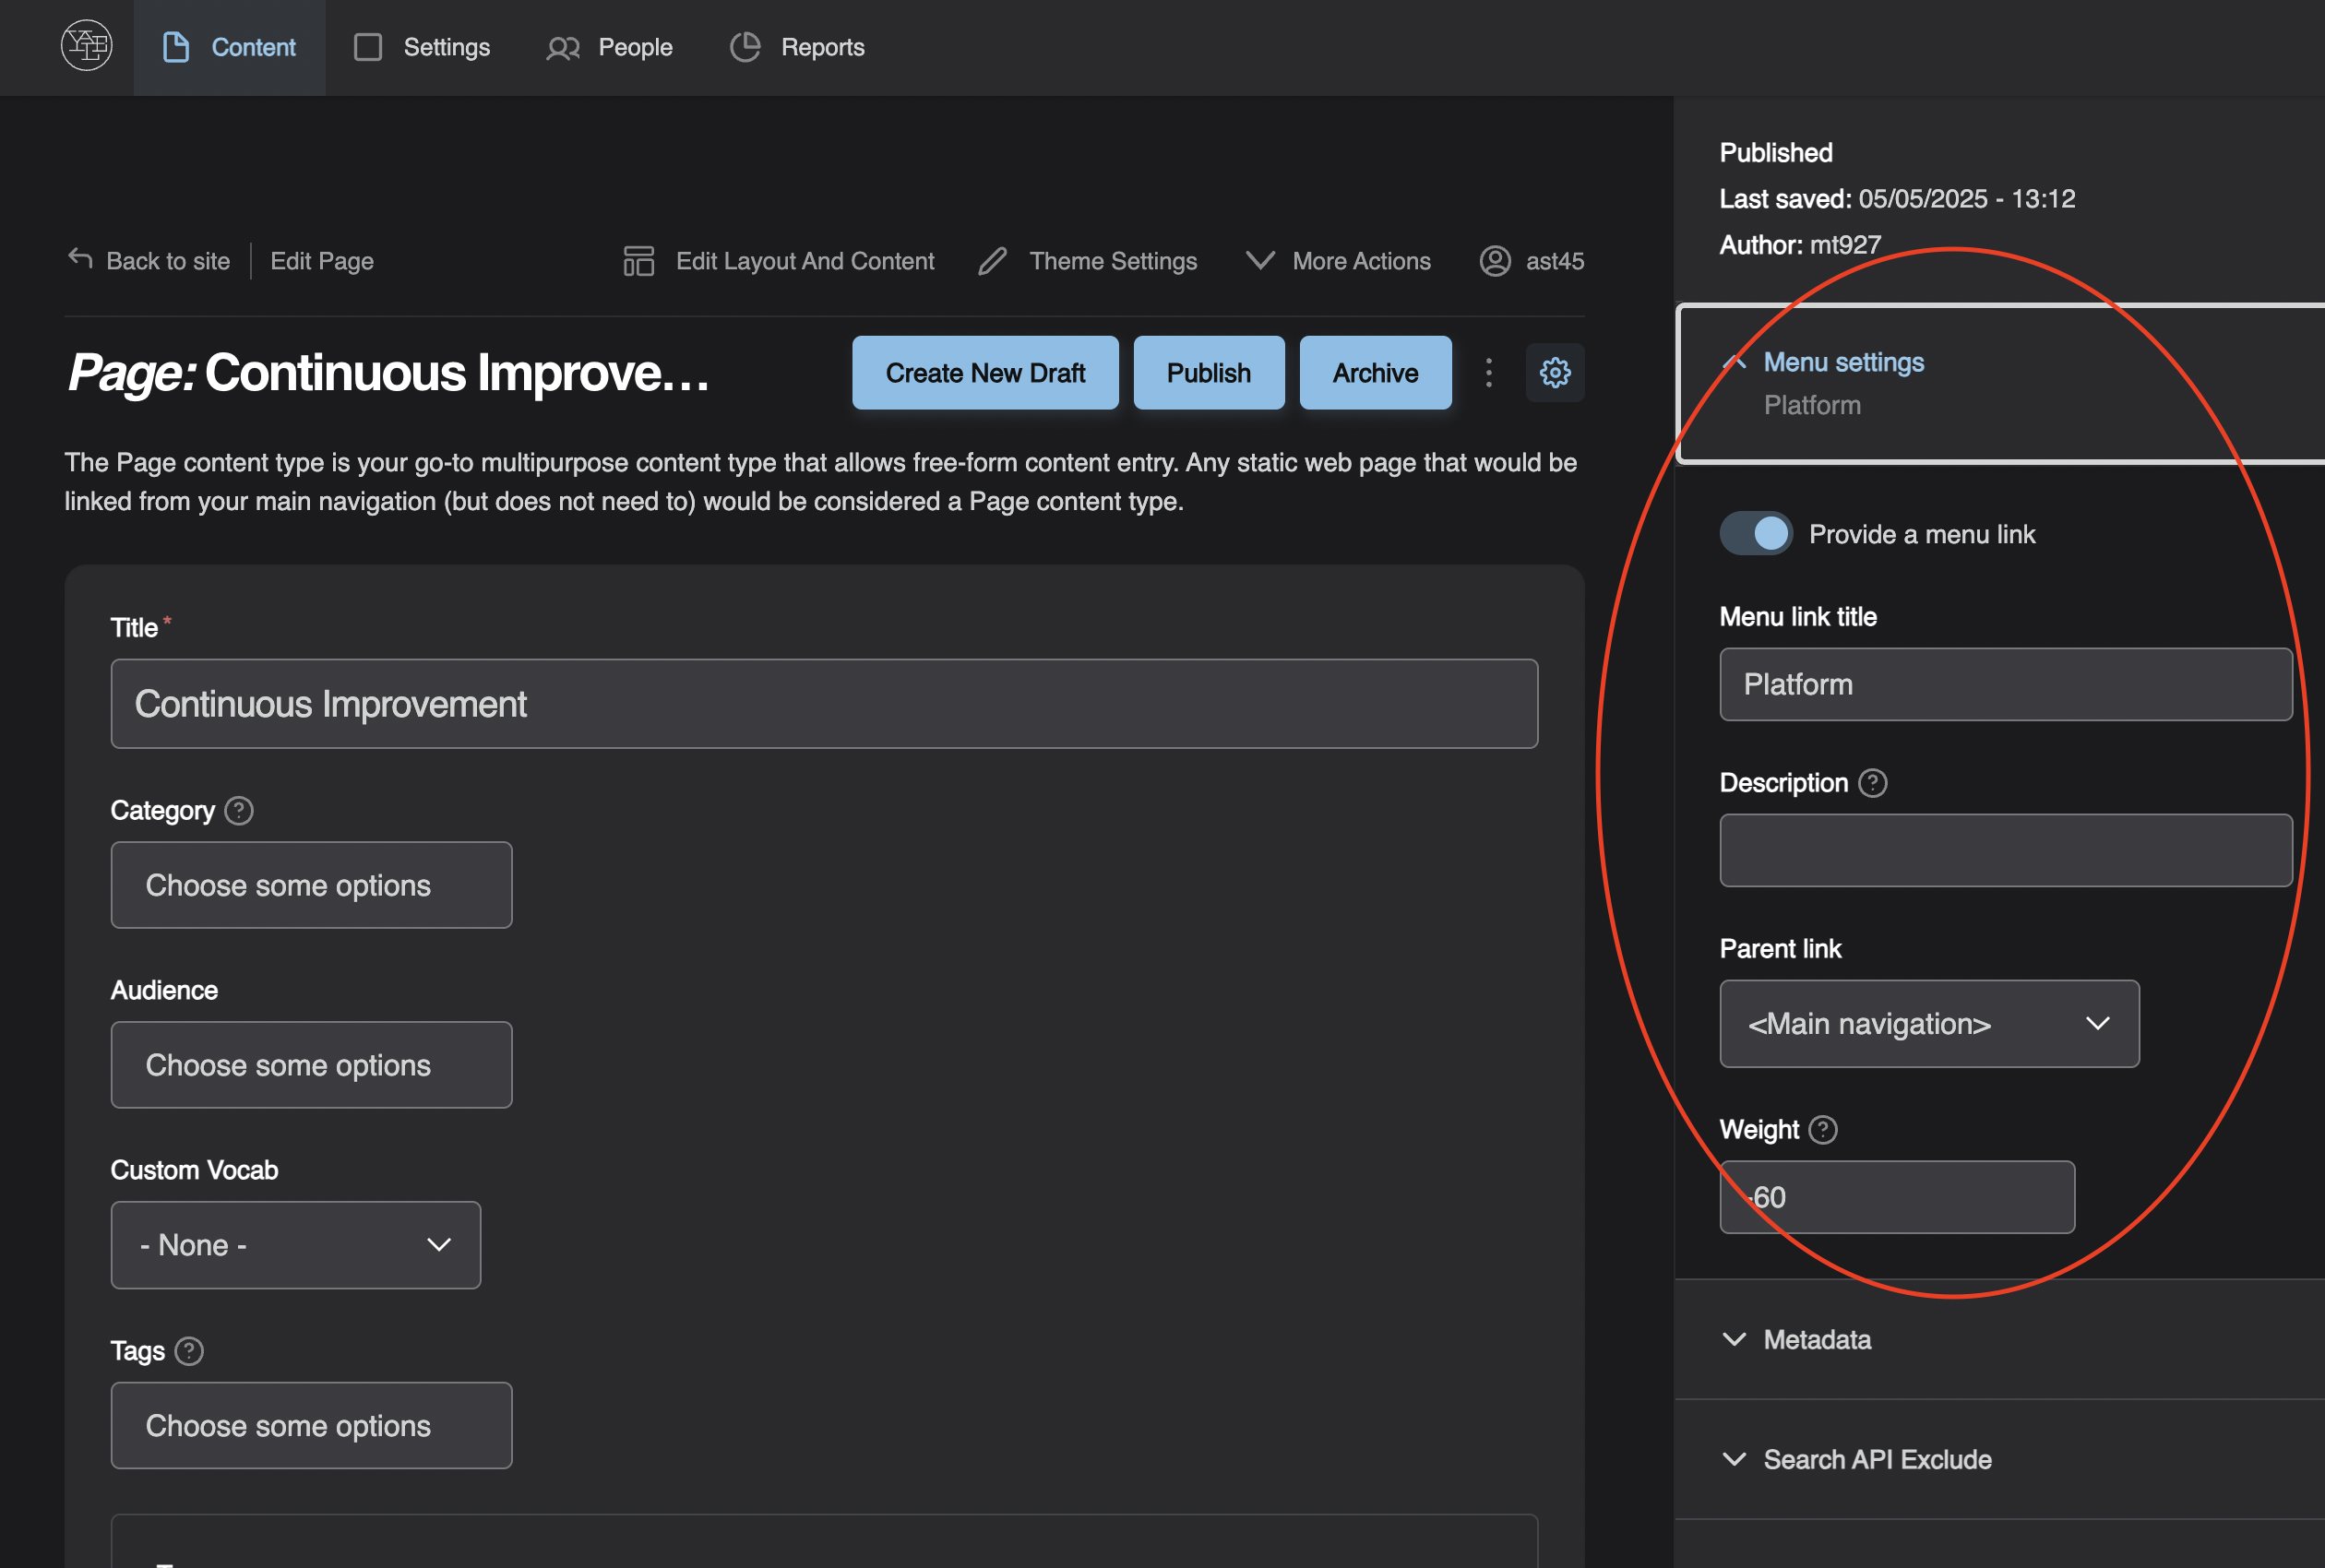
  5. Check the box labeled “Provide a menu link.”
  6. Adjust these menu options:
    • Menu Link Title – how the link will appear in the navigation (defaults to the Page Title).
    • Parent Link – choose where this page appears in the menu structure.
    • Weight – controls menu order (lower numbers appear first).
  7. Remember to “publish” to apply your changes.

Site-Wide Menu Management

In addition to editing menu settings on a specific page, you can also manage your entire site menu from the global menu builder. This is helpful when you need to reorder, remove, or organize links across multiple pages.

  1. Log in as an admin.
  2. From the top admin toolbar, go to: Content > Manage Menus
  3. Choose the menu you want to edit:
    • Main Menu – for your primary navigation
    • Utility Menu – for secondary links
    • Utility Drop-Navigation – for dropdown menus

Featuring Other Content Types (Posts, Events, Profiles)

You can’t add content types like Posts, Events, or Profiles directly to the menu. Instead, create a Page that features this content using content blocks.

Default Content Blocks

These blocks automatically pull in and display published content:

  • Post Feed Block – for recent blog or news posts
  • Calendar Block – for upcoming events
  • Profile Directory Block – for team or staff profiles [screenshot examples]

View Block (Dynamic Display)

Want more control? Use the View Block to show content based on specific filters like:

  • Post category
  • Date range (for events)
  • Tags or taxonomy terms
  • Author or profile type

This is great for building dynamic landing pages that update automatically as new content is added.

Manual Options

For more static needs, you can also:

  • Add a Reference Block to link to a specific item
  • Use a Callout Block with a CTA and link
  • Drop a Text Block with a hyperlink inside

Keep in mind: Manual links won’t update automatically if the linked content changes.
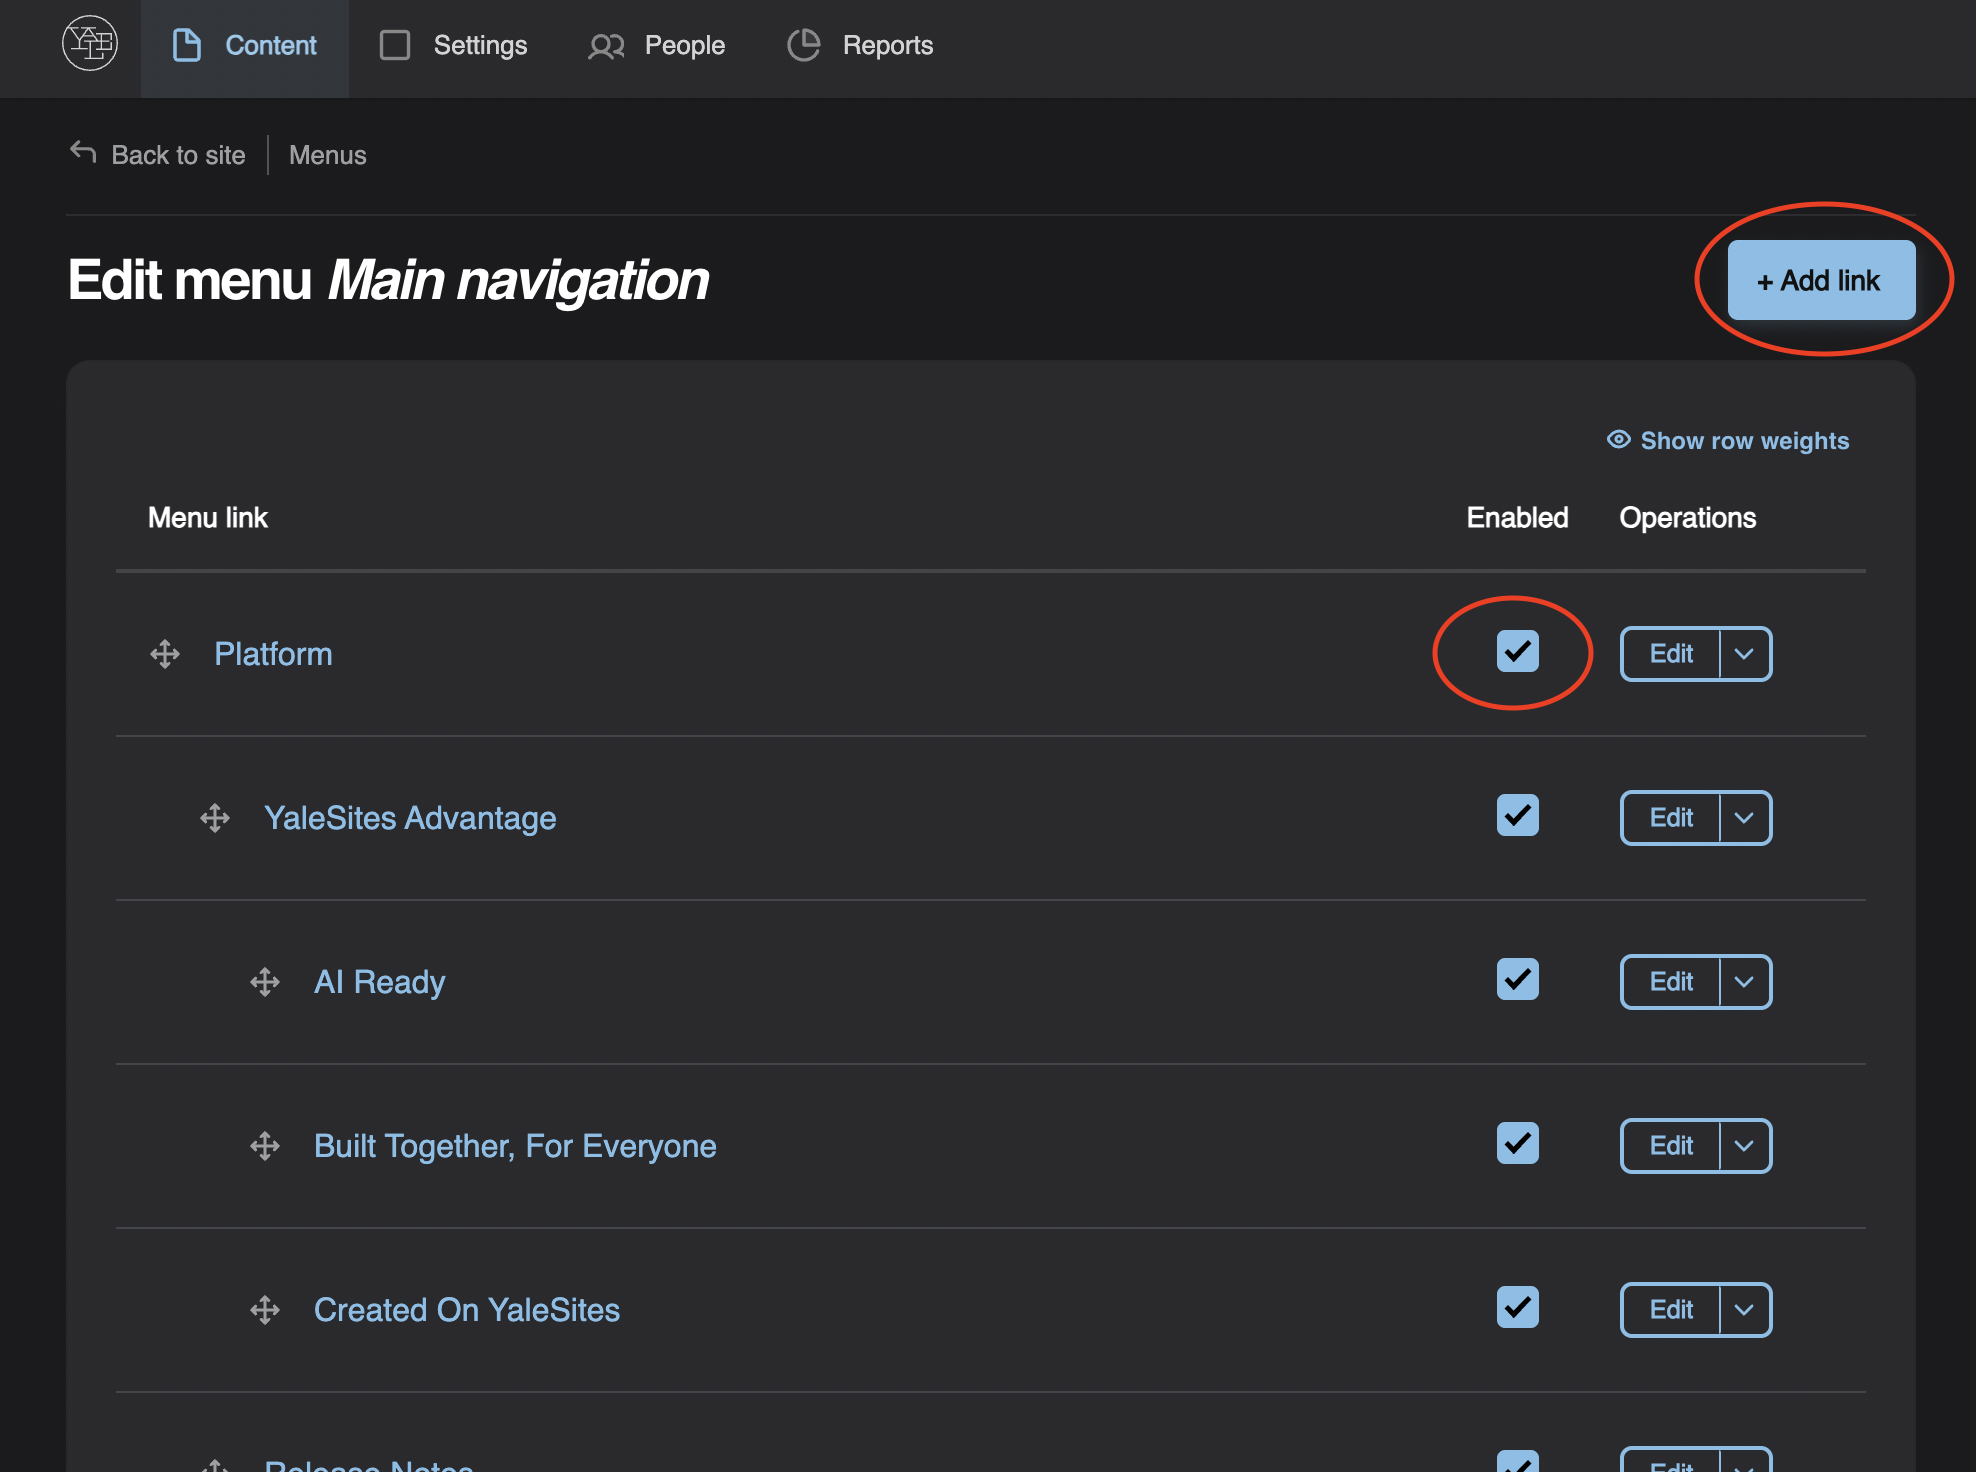
  1. Click “Add Link.”
  2. In the Link field, start typing the name of the published page and select it from the list.
    Important: Don’t paste in a URL—select from the autocomplete list.
  3. Fill out the menu details:
    • Menu Link Title – how the link will appear in navigation this can be different from Page Title
    • Parent Link – choose where this link appears in the menu structure
    • Weight – controls display order (lower = earlier)
  4. Click Save to add the link.


  • Use the Edit button to update the menu link title, parent, or other settings.
  • Use drag and drop to rearrange menu items.
  • Use row weights for precise ordering when drag-and-drop isn’t ideal.
  • Click the Enabled checkbox to show or hide a link in the live menu.

Even if a page’s menu link is disabled (unchecked), it will still:

  • Display breadcrumb navigation based on its parent/child relationship
  • Remain published and discoverable by search engines
  • Keep its URL and hierarchy intact

This is useful for creating deep site structures while keeping your visible navigation clean.

Need More Help?