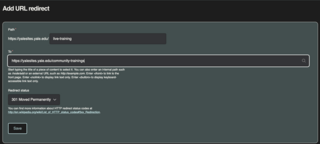
Correctly redirecting your URLs is one of the most important tasks to ensure a successful site migration. During your site migration, you might haven taken the opportunity to re-organize the structure of your site, which might have changed where some pages are located or how they’re named.
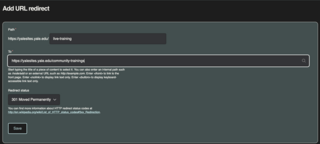
For example, let’s say your site is located at yalesites.yale.edu and you had a page where all of your live trainings were hosted and the URL was yalesites.yale.edu/live-training.
In the new site you’re migrating to, you decide to rename that page as “Community Trainings” and it changes the URL to yalesites.yale.edu/community-trainings.
If yalesites.yale.edu/live-training was a page that people frequently visited, had bookmarked, or you just want people to know what the new location of that page is, you’ll want to make sure you enable a redirect from yalesites.yale.edu/live-training to yalesites.yale.edu/community-trainings.
Adding Redirects
To add redirects, you need to be logged into your site and have the “Site administrator” role assigned to you.
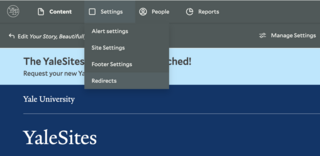
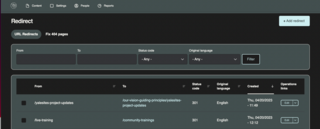
Once logged in, navigate to the administration menu, hover over (or click on) “Settings”, and then click on “Redirects”.
